Creality Cloud - 3D Printing
- 1.96K
- 4.5
- Installs
- 5.00M
- Price
- Free
Screenshots
Analysis by Reviewed
I approached Creality Cloud as a beginner who wanted one practical place for exploring 3D models, preparing a print, and keeping an eye on a compatible printer. That is the app’s real appeal: it brings several parts of the 3D-printing process into a mobile workspace instead of making you jump between a model site, a slicer, a viewer, and a printer-control tool.
My first impression was that this is much more than a gallery. It is a free tools app from Creality Cloud, rated around 4.5 by roughly 36 thousand users, with more than five million installs. Those figures suggest that it has become a familiar companion for many makers, but popularity does not automatically make it simple. The app can feel broad at first, especially if you are still learning the difference between a model file, a sliced print job, and a printer connection.
The best way to use it is to begin with one small goal. I would not install it expecting to understand every menu immediately. Instead, I would use it to find a suitable model, inspect it in the 3D viewer, prepare it with the slicer, and only then explore remote printer control or design tools. That order makes the experience far less confusing.
What the app is really useful for
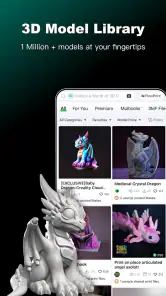
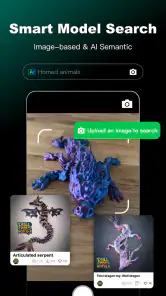
The main strength here is the combination of tools. Creality Cloud includes a 3D model library, a slicer, a viewer, remote control for a 3D printer, and a 3D design area. In everyday use, that means I can start with inspiration, check whether a model looks sensible from different angles, and move toward printing without immediately opening a desktop program.
For someone new to 3D printing, this can remove a lot of friction. The usual alternative is to browse models in one service, download a file, open it in separate slicing software, transfer the result to a printer, and then use another method to monitor the job. That workflow can still be better for detailed control, but it also creates more places where a beginner can lose track of the file or choose an unsuitable setting.
The mobile approach is particularly convenient when I am away from my computer. I can use spare time to browse ideas, inspect a model, or prepare a project before I am ready to print. I would still treat the phone as a companion rather than a complete replacement for a desktop setup when a project needs careful calibration, extensive supports, or detailed material planning.
There is also a useful distinction between looking at a model and preparing it. The viewer helps me judge the object’s shape and orientation, while the slicer turns that object into instructions for a printer. Keeping those stages mentally separate prevents a common beginner mistake: assuming that a model that looks attractive is automatically ready to print.
Who will get the most from it
I think Creality Cloud suits three kinds of users especially well. The first is a beginner who wants a guided route from discovering a model to attempting a print. The second is a Creality printer owner who wants mobile access to parts of the workflow. The third is a hobbyist who enjoys collecting ideas and testing small projects without sitting at a desktop computer every time.
It is less convincing for someone who already has a highly refined desktop workflow and depends on advanced slicer controls. A phone screen is convenient, but convenience and precision are not always the same thing. If you regularly adjust complex support structures, compare many profiles, or need a very exact view of every setting, dedicated desktop software may remain the better main tool.
The app is marked for Everyone, which makes it approachable for households and younger makers using it with suitable supervision. The developer is Creality Cloud, and the app is free to install. There are in-app purchases ranging from under a dollar to several hundred dollars per item, so I would pay attention to any purchase screen rather than assuming every part of the experience is included at no cost.
Starting without getting lost
After installing it, I would begin by looking through the model library rather than opening every feature. Search for a simple object with a clear purpose, such as a small organizer, a basic hook, or a simple decorative piece. A compact first project is more useful than an ambitious figurine because it lets you learn the workflow without wasting much material or time if something goes wrong.
When examining a model, I would rotate it in the viewer and look for practical issues. Does it have a flat-looking base? Are there thin parts that could be fragile? Are there large overhangs? Is the object made of several pieces? These questions are more important than whether the thumbnail looks impressive. A model library encourages browsing, but the viewer gives me a chance to make a more sensible choice.
One helpful habit is to decide the intended use before slicing. A model meant to sit on a desk can tolerate different choices from a part that must bear weight or fit another object. The app can help move a project toward printing, but it cannot remove the need for judgment about strength, orientation, and material.
The first setup can feel easier if I separate browsing from printer connection. I do not need to solve every connection question before learning the library and viewer. I would first become comfortable opening a model and understanding its basic presentation. Then I would move to slicing, and only after that deal with remote printer control.
For a compatible printer workflow, I would check the exact device options shown inside the app and keep the printer available while trying to connect it. If the connection does not behave as expected, I would avoid repeatedly changing unrelated settings. Instead, I would return to the printer-control area, verify that I am working with the intended device, and test with a small project rather than a large print.
The first meaningful success
For me, a successful first session would not be creating a complicated design. It would be taking a modest model from the library, inspecting it, slicing it, and understanding what happens next. That sequence teaches the important vocabulary of the app and gives a beginner a concrete result to build on.
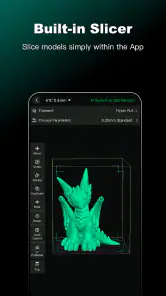
Once I choose a model, I would use the slicer carefully rather than accepting every option automatically. I would look at the object’s placement, check whether the preview appears complete, and pay attention to any visible signs that the model needs support or a different orientation. The preview is valuable because it can reveal a problem before material is used.
A practical tip is to treat the first slice as an experiment. Do not begin with the largest or most detailed object available. Use something that can show whether the printer receives the job correctly and whether the result matches the preview. If the first print has an issue, a small test makes it easier to identify whether the cause was the model, the slice, the printer, or the physical setup.
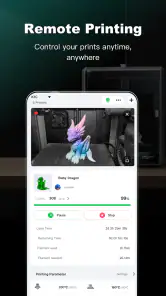
Remote control becomes more useful after that first successful handoff. I would use it to check the state of a print rather than constantly watching the screen. That is a meaningful advantage over a purely local workflow: I can step away and still have a convenient place to check progress, provided the printer and app connection remain available.
There is a trade-off here. Remote access is helpful for convenience, but it should not encourage careless supervision. I would still treat an unfamiliar print as something worth checking in person, especially when using a new model or material. A mobile status view can tell me what the app reports; it does not replace looking at the actual machine when a problem might be developing.
Where beginners commonly hesitate
The biggest source of confusion is that the app brings together discovery, design, slicing, viewing, and printer control. Those features are related, but they are not interchangeable. A model in the library is not necessarily a finished print job, and a design tool is not the same as a slicer. Once I understood that each area represented a different stage, the layout made more sense.
Another point of friction is deciding whether a model is suitable for a first attempt. A polished image can hide difficult geometry. Thin walls, unsupported angles, small moving parts, or a complicated assembly can turn a promising download into a frustrating lesson. I would use the viewer as a screening tool and favor models whose shape is easy to understand.
It is also easy to confuse a successful slice with a successful print. Slicing prepares instructions, but the physical result still depends on the printer, the selected material, the build surface, and the chosen settings. The app is strongest when it helps me organize the digital part of the process; it cannot guarantee the mechanical outcome.
Storage and attention can become issues as well. A model library invites endless browsing, and it is tempting to collect projects without finishing any. I get more value when I keep a short queue: one model to inspect, one model to prepare, and one model to print. That simple limit turns the app from an inspiration feed into a practical workshop assistant.
The design tools are worth exploring once the basic workflow feels comfortable. I would not begin there unless I already had a clear idea of what I wanted to make. For a first-time user, modifying or creating something can be more rewarding after learning how ordinary models behave in the slicer. Otherwise, it is difficult to tell whether a failed result comes from the design itself or from an unfamiliar print process.
How it compares with separate tools
Compared with using a model library and desktop slicer separately, Creality Cloud is more convenient and less fragmented. I can move from browsing to preparation within the same general environment, and mobile access makes small decisions easier to handle away from a desk. That is the clearest reason to choose it.
Separate desktop software usually wins when I need a larger interface and deeper control. On a computer, it is easier to inspect complex geometry, compare settings, manage files, and make careful adjustments. I would choose that route for demanding functional parts, repeated production, or a print where failure would be expensive.
Compared with a basic 3D viewer, this app goes much further because it connects inspection with slicing and printer-related actions. Compared with a simple remote-monitoring tool, it is broader because it also includes discovery and design. The cost of that breadth is a busier experience. If I only wanted to check one printer status, the extra sections might feel unnecessary.
The app is also a better fit for people already using compatible Creality equipment than for someone seeking a completely printer-neutral workflow. I would check compatibility before building my entire routine around remote control. Even when the library and viewer are useful independently, the printer-related value depends on how well the app fits the machine I actually use.
Small habits that make the workflow better
My first recommendation is to preview before committing. Rotate the model, inspect its base, and think about how it will sit on the print surface. This takes less time than discovering halfway through a print that the chosen orientation creates unnecessary support or a fragile contact point.
My second recommendation is to keep the first project intentionally boring. A simple object teaches more than a spectacular failure because it isolates the workflow. Once I know that I can move from model selection to slicing and printer handoff, I can introduce more complex shapes one variable at a time.
Third, I would use remote control as a check-in tool rather than a substitute for setup. Before leaving a print unattended, I would make sure the physical printer is ready and the job has started as expected. The app is most useful after the basic conditions are sound.
Finally, I would keep track of why I changed a setting. If a print improves, I want to know which decision helped. If it fails, I want a short list of things to reconsider. This habit matters because the app makes experimentation easy, but easy experimentation can become random experimentation without a little discipline.
What to expect from the current app
The app was released in early 2020 and is currently at version 7.3.19, with Android support beginning at version 7.0. That gives it a broad place on many Android devices, although the actual comfort of using a slicer and viewer will still depend on the phone or tablet screen. A larger display is preferable when inspecting a model or reviewing a slice.
The average rating of about 4.5 and its large user base make it an easy app to consider, but I would not interpret those numbers as a promise that every printer workflow will feel effortless. A tool that combines so many stages can be genuinely useful while still requiring patience during setup and learning.
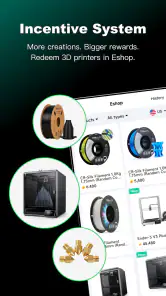
Because the app is free to install, it is reasonable to try it with a small project before deciding whether it deserves a permanent place in your routine. I would be especially careful around optional purchases, since the available in-app items can range from roughly one dollar to several hundred dollars. A beginner should never feel pressured to buy something merely to understand the basic workflow.
My recommendation for a first session
I would begin by installing the app, opening the model library, and choosing a simple object with an obvious purpose. I would inspect it in the viewer, think about its base and overhangs, and then open the slicer. After checking the preview, I would use a compatible printer only when I understood what job I was sending and why that model was a sensible first test.
After the first print or test handoff, I would return to the app and explore remote control. Only then would I spend time with the design tools or browse more ambitious projects. This progression answers the questions most beginners have: what should I do first, do I need a printer immediately, and when should I worry about advanced settings? Start with understanding, then add complexity.
My overall view is that Creality Cloud is most valuable as a bridge between curiosity and action. It makes 3D printing feel less scattered, gives beginners a practical route into the hobby, and offers useful mobile access for people who already work with compatible equipment. Its wide feature set can be confusing, and serious users may still prefer desktop tools for demanding jobs, but those limitations do not cancel out its convenience.
I would recommend it to a first-time maker who wants to learn by completing a small project rather than studying every option in advance. I would also recommend it to an experienced user who wants a mobile companion for browsing, preparation, and printer checks. I would skip it as my main tool only if I needed highly specialized desktop control or a strictly printer-independent workflow. For everyone else, the best first step is simple: choose one manageable model, inspect it carefully, and let that first successful action teach you the rest.
Pros
- Large library of downloadable 3D models and printable designs.
- Useful slicing tools for preparing models from a mobile device.
- Supports remote monitoring of compatible Creality printers.
- Active community for sharing models
- tips
- and printing results.
- Convenient access to Creality contests
- tutorials
- and learning resources.
Cons
- Some features require a compatible Creality printer or account.
- Model quality and printability can vary significantly between uploads.
- Cloud slicing and file transfers depend heavily on internet stability.
- The interface may feel crowded because of its social and shopping sections.
- Advanced printer controls may be limited compared with desktop software.
- Category
- Tools
- Version
- 7.3.19