Storyla AI: Photo to Video
- 0.00
- 0.0
- Installs
- 10.00K
- Price
- Free

Screenshots
Analysis by Reviewed
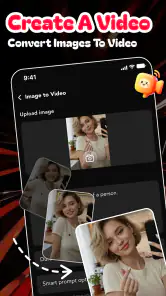
Turning a still photo into something that feels alive sounds simple, but the result depends on much more than pressing an animation button. Storyla AI: Photo to Video is aimed at that exact moment: taking an image and giving it movement, atmosphere, and a more shareable format. I found the idea appealing because it sits between ordinary photo editing and full video production. You do not need to begin with a timeline, several clips, or a complicated editing lesson.
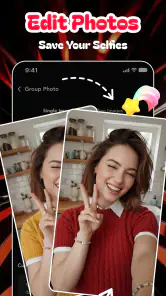
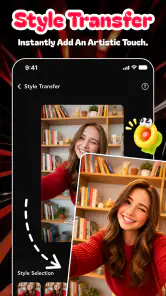
Instead, the app belongs to the art and design side of mobile creativity, with AI doing much of the visual work. Its focus is useful for people who want to experiment quickly with photos, creative effects, templates, and animation. At the same time, I would not treat it as a replacement for a complete video editor. Its strength is fast visual transformation, while detailed control and predictable results are more important in other kinds of projects.
Storyla AI is free to install, although it includes in-app purchases ranging from $1.99 to $99.99 per item. It is developed by ayselmvaysin, has passed 10K+ installs, and is marked for a Mature 17+ audience. The app is listed as version 1.0.2 and works from Android 7.0 onward. Those details matter because the experience is likely to vary considerably between an older phone and a recent device, especially when an image is being processed into a video.
Where the experience can become confusing
The first challenge is choosing the right kind of photo
The most common mistake with an image-to-video app is blaming the animation when the original picture is not suitable for it. A crowded photo, a very small image, or a subject hidden near the edge gives the system less visual information to work with. Before importing anything, I would choose a sharp image with one clear subject and enough space around it. A portrait, product shot, pet photo, or scenic image is easier to judge than a busy group picture.
This is also where expectations need to be realistic. AI animation can make a still image feel dynamic, but it does not turn every photograph into a naturally filmed scene. Faces, hands, text, reflective surfaces, and repeated patterns can be especially sensitive to movement. If a result looks strange, trying a cleaner source image is often more useful than repeatedly changing templates.
Templates are a starting point, not a finished decision
Templates can save time, but they also encourage a trial-and-error habit. I would first decide what the image is supposed to communicate. A gentle effect may suit a family memory or a quiet landscape, while a stronger visual treatment may work better for a promotional image or a social post. Selecting effects randomly can produce something technically animated but emotionally mismatched.
A practical approach is to make a private test with the same photo and compare a restrained option with a more dramatic one. Look at the subject’s face, the edges of objects, and any writing in the frame. If the effect makes the main detail harder to understand, it is not helping, even if the movement appears impressive at first glance.
Why a result may feel underwhelming
Still images contain no real camera movement, so the app has to infer how motion might look. That inference works best when the composition gives the animation room to breathe. A tightly cropped face or a flat image with no visible depth may produce a subtler result. This is not necessarily a technical failure; it can simply be a mismatch between the source and the selected style.
I also recommend judging the result after watching it more than once. The first viewing can make an effect seem exciting because it is new. On a second look, repeated motion, awkward transitions, or distracting background changes become easier to spot. That small review habit prevents me from saving a clip that looked good only for a moment.
Age guidance and audience fit
The Mature 17+ content rating is worth taking seriously when deciding who should use the app. I would not hand it to a younger child without an adult checking the experience first. Parents should also be comfortable with the fact that creative apps can invite experimentation with personal photos and sharing workflows. Even when the creative goal is harmless, it is sensible to use copies of important images and think carefully before publishing the result.
Setup checks that prevent avoidable trouble
Start with the phone, not the effect
Because this type of app may need to process images and generate video, I would begin by closing demanding apps and making sure the phone has enough free storage for temporary files. An older Android device may open the app successfully but still struggle during heavier processing. The minimum supported system is Android 7.0, but meeting a minimum requirement does not guarantee that every effect will feel equally quick.
If the app seems frozen, I would wait briefly before tapping the same control several times. Repeated taps can create confusion about whether a request was submitted once or multiple times. If nothing changes, restarting the app and trying a smaller or simpler image is a better first step than immediately assuming the project is lost.
Prepare images for a smoother workflow
I get better results when I prepare the source image before opening the creative tool. I crop away unnecessary borders, check that the subject is visible, and avoid screenshots with notification bars or interface clutter. For a design containing words, I keep the text large and high-contrast because movement can make small lettering harder to read.
It is also useful to keep the original image untouched. I create a duplicate for experimentation so that an unexpected crop, effect, or export does not replace the version I may want later. This is a small habit, but it matters when the app is being used for invitations, shop images, personal memories, or any work that cannot easily be recreated.
Understand the free and paid boundary before committing
The app is free, but purchases are available inside it. I would explore the basic workflow first and only consider paying after confirming that the style of animation suits my needs. The listed purchase range begins at $1.99 per item and reaches $99.99 per item, so the difference between a small experiment and a major purchase can be substantial.
For that reason, I would read each purchase prompt carefully rather than treating every locked option as something essential. A paid effect may be worthwhile for a specific project, but it does not automatically improve a weak source image. The best safeguard is to decide what result I need before spending: a quick personal clip does not deserve the same budget as repeated creative work.
Use a simple first project
My first test would be one photo, one visual direction, and one short creative goal. I would not begin with a large collection of images or attempt to build a complete campaign. A simple test makes it easier to tell whether a problem comes from the picture, the chosen effect, the phone, or the export stage.
This approach also answers an important practical question: can someone use the app without being experienced in video editing? In my view, yes, if the goal is a quick transformation rather than precise production. The learning curve is gentler than starting with a conventional timeline editor, but the user still needs to make visual choices and inspect the result critically.
Keep expectations clear on older hardware
Android 7.0 compatibility makes the app accessible to a broad range of devices, but compatibility is not the same as identical performance. On a phone with limited memory or an older processor, processing may take longer and switching between apps may be less comfortable. I would avoid judging the app from one rushed attempt made while the phone is busy with other tasks.
If the phone repeatedly closes the app, I would first restart it, reduce the complexity of the project, and check for available storage. If the same behavior continues across several simple images, the device may be the limiting factor rather than the creative workflow itself. In that situation, a newer phone or a lighter editing method may be more practical.
Recovering a workflow when something goes wrong
When the import does not behave as expected
If an image does not appear correctly, I would make a fresh copy and save it in a common image format before trying again. I would also avoid importing an edited screenshot when the original camera image is available. A clean file gives the app a better starting point and makes it easier to identify whether the issue is connected to the image itself.
Another useful recovery step is to simplify the file. Crop it, remove unnecessary elements, and test the new version. If the simplified image works, the original may have been too complex for the selected treatment. If neither version works, restarting the app and testing a different photo can reveal whether the issue is project-specific.
When processing appears stuck
Processing can feel uncertain because the creative result is not visible immediately. I would avoid leaving the app while a project is being generated, especially on a less powerful device. If the screen remains unchanged for an unreasonable amount of time, I would close and reopen the app, then retry with a single uncomplicated image.
It is important not to keep submitting the same request repeatedly. That can make it difficult to know which result belongs to which attempt and may consume time or any limited access associated with a feature. A small notebook-style habit helps: remember the image and effect used for each test, then change only one variable on the next attempt.
Recovering from an awkward animation
When the subject bends, stretches, or moves in a distracting way, I would not immediately discard the whole idea. First, I would switch to a less aggressive effect. Next, I would crop the image so the subject is more clearly framed. Finally, I would test a different photograph of the same subject. These three changes address different causes: style intensity, composition, and source quality.
One non-obvious trade-off is that a visually dramatic effect may be less useful than a restrained one once the video is shared. Strong movement can hide facial details, make product edges look unstable, or reduce the readability of a message. For a social post, the best result is often the one that supports the photo instead of competing with it.
What to do if the finished clip is not what you imagined
I would inspect the output for three things: whether the main subject remains recognizable, whether the motion repeats in an irritating way, and whether any important text or detail stays readable. If all three pass, the clip is probably doing its job even if it is not cinematic. If one fails, I would revise the source or effect before considering a different app.
This is where Storyla AI differs from a traditional editor. A timeline editor gives me direct control over cuts, timing, layers, and transitions. Here, the attraction is speed and creative interpretation. That makes it better for spontaneous visual experiments, while a manual editor is the safer choice when every movement must be planned.
When the app is not the cause
Not every failed share or missing result points to the application. A weak connection, a full storage area, an overloaded phone, or an image that was already heavily compressed can all create trouble. I would test the same workflow under calmer conditions before deciding that the app is unreliable.
For a realistic everyday example, imagine preparing a birthday message from one family photograph. I would duplicate the photo, crop it so the faces are clear, choose a gentle animation, and review the finished clip before sending it. If the result looks unnatural, I would try a second photo rather than repeatedly forcing the first one through stronger effects. That workflow is faster and safer than building a complicated video from scratch, while still leaving room for judgment.
The same logic applies to a small seller creating a product post. A clean product image with generous space around the object is a better candidate than a cluttered table shot. I would check whether labels remain readable after animation and use the result as an attention-grabbing introduction, not as the only source of product information. For precise demonstrations, a conventional video editor remains more dependable.
Who will get the most from it
I think the app suits casual creators, social media users, people making personal greetings, and anyone curious about AI-assisted visual design. It is also a reasonable entry point for someone who finds full video editors intimidating. The combination of photos, templates, effects, and animation can turn a familiar image into something more expressive without requiring a large editing project.
It is less suitable for users who need frame-by-frame control, consistent branding across many clips, exact text placement, or dependable professional output. Photographers who want to preserve a still image without reinterpretation may also prefer a standard editor. Likewise, anyone uncomfortable with a Mature 17+ rating or in-app purchases should approach it cautiously and review the experience before allowing another person to use it.
My practical verdict
After looking at the workflow as a whole, I see Storyla AI as a focused creative tool rather than an all-purpose video studio. Its appeal is the short path from a single photo to an animated idea. That path is especially useful when I want a quick visual for a message, a social post, or a personal experiment and do not want to assemble a timeline manually.
The main lesson is to treat the source photo as part of the editing process. Clear composition, readable details, and a restrained effect usually matter more than choosing the most dramatic template. I would also test the free experience first, keep original images safe, and remember that the broad purchase range makes careful confirmation important before buying anything.
With version 1.0.2 and a growing install base of over 10K, the app is still best approached as a developing creative option rather than a mature replacement for established editors. That is not a criticism by itself; newer tools can be enjoyable precisely because they make experimentation approachable. My recommendation is simple: try it when speed and playful animation matter, but choose a conventional editor when precision, repeatability, or detailed production control matters more.
My final advice is to begin with one good photo and one modest effect. If the result preserves the subject and adds the mood you wanted, Storyla AI has done something useful. If it distorts important details or leaves you wanting exact control, that is the point where another editing approach will serve you better.
Pros
- Turns still photos into engaging short video clips quickly.
- AI effects add motion without requiring video-editing skills.
- Simple interface makes the app approachable for beginners.
- Useful for creating social media posts and story content.
- Offers creative templates for experimenting with different visual styles.
Cons
- Results can vary noticeably depending on photo quality and composition.
- Some effects may look artificial or overly repetitive.
- Export options may be limited without a premium subscription.
- Processing can take longer when applying complex AI animations.
- Privacy terms should be checked before uploading personal photos.

- Category
- Art & Design
- Version
- 1.0.2