Artlume: AI Video Gen
- 0.00
- 0.0
- Installs
- 10.00K
- Price
- Free

Screenshots
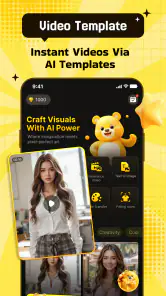
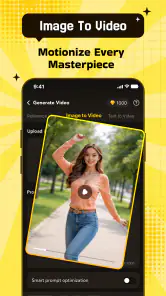
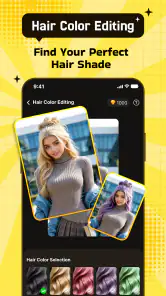
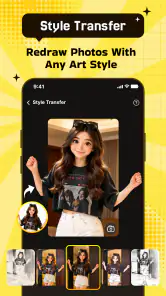
Analysis by Reviewed
I approached Artlume: AI Video Gen as someone who wanted to turn ordinary photos into short, expressive visual pieces without opening a full desktop editor. It belongs to the art and design category, and its main appeal is the way it brings AI-assisted motion, creative effects, templates, and editing into one mobile workflow. That makes it interesting for people who have plenty of images but do not want to learn a complicated timeline before seeing a result.
My first impression is that this is best understood as a quick creative tool rather than a complete replacement for professional video software. You start with a photograph, choose a visual direction, and shape the result through available effects and edits. The experience is aimed at experimentation: a portrait can become more atmospheric, a travel image can feel more alive, and a product photo can be turned into a short social post. The strongest reason to try it is speed from still image to shareable concept, not detailed control over every frame.
What to expect before making your first video
The app is free to install, although it includes in-app purchases ranging from $1.99 to $99.99 per item. That combination is common in creative apps, but it is worth keeping in mind before you begin exploring every effect or template. I would start with the free experience and decide whether the workflow suits you before paying for anything. For a casual user, the important question is not how many tools appear on screen; it is whether the first result feels useful enough to keep refining.
Artlume is developed by Uğur Cebeci and is currently at version 1.0.0. It requires Android 7.0 or later, so it can work on a broad range of Android phones, though the smoothness of AI-focused editing will still depend on the device you use. The app is marked Mature 17+, which is a signal for users and families to consider the intended audience before installing it. It has passed 10K+ installs, so it is still a relatively small product compared with long-established mobile editors.
That smaller footprint does not automatically make it a poor choice. In fact, a focused app can be less intimidating than a crowded editor filled with menus for color curves, keyframes, masks, and audio mixing. The trade-off is that a newer, narrowly focused tool may feel less predictable when you want a very specific professional result. I would choose it for visual ideas, personal posts, mood clips, and quick experiments rather than for a carefully controlled commercial production.
The phrase “AI video” can also create unrealistic expectations. A still image does not suddenly become a fully directed film with perfect physical movement. The most satisfying results usually come from images that already have a clear subject, good lighting, and enough visual space for motion to be suggested. A simple portrait, landscape, pet photo, or object against a clean background gives the effect more room to look intentional.
Preparing a photo that gives the app something to work with
Before opening the editor, I would make a small selection instead of importing a large camera roll. Pick three images with different purposes: one portrait, one scene with depth, and one simple object. This makes it easier to judge whether the app is genuinely useful for your style rather than just impressive on a single lucky image.
Crop distractions first if the original picture has clutter near the edges. AI motion effects often draw attention toward the subject, so a busy background can become more noticeable once movement is added. A photo with a clear focal point is usually a better starting point than a technically sharper image that contains too many competing details.
There is also a practical reason to keep the first experiment short and simple: you are learning the relationship between the source photo, the chosen template, and the final edit. If you change all three at once, it becomes difficult to understand what improved the result. I prefer to reuse one strong image with two different creative treatments, then compare the mood rather than judging only whether the animation looks dramatic.
Getting through the first setup without overthinking it
After installation, I would resist the temptation to browse every visual option immediately. The clearest route to a meaningful first result is to choose one photo and look for the main creation action. Artlume is designed around transforming images, so the first task should be selecting a source image rather than trying to configure a complete project.
Keep the first session focused on three decisions: which image to use, what kind of visual feeling you want, and how much editing the result actually needs. If you are working with a portrait, decide whether you want a gentle, cinematic, playful, or more surreal direction. If you are using a landscape, think about whether movement should make it feel calm, dramatic, or dreamlike. Having that intention makes template browsing much faster.
I also recommend saving the original image separately before experimenting. That is not because the app is difficult to use, but because creative editing works better when you can try a bold treatment without worrying about losing the clean source. It lets you compare a restrained version with a more noticeable effect and decide which one still looks like your photo.
The first setup is also a good moment to consider your destination. A clip intended for a personal message can be more experimental than one intended for a public profile. For a public post, I would pay closer attention to faces, text, and small background details. Motion can make an image more eye-catching, but it can also expose odd edges or make a decorative element feel distracting.
The quickest route to a first successful result
For a reassuring first attempt, I would use a well-lit photo with one obvious subject. Import it, choose a template or effect that supports the subject instead of competing with it, and preview the result before adding extra edits. This order matters. If the basic transformation already feels wrong, additional adjustments may only hide the problem temporarily.
Once the first version works, make one change at a time. Try a different visual treatment while keeping the image the same, or keep the treatment and switch to another photo. This simple comparison reveals whether the effect is versatile or whether it only suits a particular type of image. It also prevents the common beginner mistake of stacking every attractive option until the original subject disappears.
A realistic everyday use case would be preparing a birthday greeting from a favorite family photograph. I would choose a clear image, apply a restrained motion effect, add only the edits that support the mood, and preview it on the phone before sharing. The result does not need to look like a film trailer. A small amount of movement can be enough to make a familiar photograph feel personal and fresh.
Another useful workflow is creating a visual draft for an idea that may later be edited elsewhere. For example, a small business owner could animate a product photograph to test whether a concept attracts attention before spending time on a larger campaign. In that situation, Artlume is valuable as a rapid concept generator. I would not treat the first AI result as a final brand asset without checking details carefully, but it can help answer the early question of whether the idea has visual potential.
For social content, the app can be more convenient than building an animation from scratch. A person who normally posts static images can add variety without learning a full video editor. The important tip is to keep the visual message simple: one photo, one dominant effect, and edits that improve clarity. The more elements you add, the more likely the result is to feel like a template rather than something made for that particular image.
Where beginners may become confused
The first point of confusion is likely to be the difference between an AI transformation and a conventional editing adjustment. Traditional tools let you make a predictable change such as cropping, adjusting color, or placing text. An AI effect may interpret the image and produce a more expressive result, which means the outcome can vary depending on the subject and composition. If the result does not match your intention, that does not necessarily mean the photo is unusable; it may simply need a different visual direction.
Templates can create a similar misunderstanding. A template is not always a neutral frame around your photo. It can influence the rhythm, mood, and visual emphasis of the finished piece. I would treat each template as a creative opinion. If your photo has a quiet, minimal quality, a highly dramatic template may overpower it even when the effect itself looks polished.
Another common issue is assuming that more motion equals a better result. With portraits, excessive movement can make the face feel unnatural. With architecture or product images, strong animation can distract from the shape you wanted people to notice. My practical rule is to preview the result once with the sound or other distractions removed from your environment and ask whether the subject still looks convincing when viewed quickly.
Users may also wonder whether they need editing experience. In my view, no advanced background is necessary for the first project, but a little visual judgment helps. You do not need to understand professional compositing, yet you should be willing to reject an effect that makes the image less clear. The app can suggest a direction, but it cannot decide whether that direction fits the purpose of your photo.
It is equally important not to confuse a fast workflow with unlimited flexibility. Someone who wants precise timing, detailed layer management, complex typography, advanced audio work, or frame-by-frame corrections may feel restricted compared with a dedicated mobile video editor. Those tools take longer to learn, but they offer more control. Artlume is the better choice when the creative starting point is a photo and the desired result is an expressive short video, not when the project already requires a full production timeline.
How it compares with ordinary photo and video editors
A standard photo editor is usually stronger when the goal is correction: removing distractions, balancing exposure, sharpening a subject, or preparing an image for print. Artlume is more appealing when the goal is transformation. Instead of asking only how to make the photo cleaner, you are asking how to give it a sense of movement and atmosphere.
A conventional video editor is stronger when you already have several clips and know exactly how they should be arranged. You can normally control cuts, timing, text placement, and sound with greater precision. Artlume offers a different entry point by treating a single photograph as the material for a video idea. That makes it less demanding for a first experiment, but not necessarily the best place to finish a complex project.
Compared with manual animation, the app’s advantage is the reduction in setup time. You do not have to build every movement from individual controls before seeing whether the concept works. The disadvantage is that an automated interpretation may not follow your exact intention. I would use Artlume to discover a direction, then move to a more detailed editor only if the project deserves precise finishing.
This distinction is especially useful for creators who post regularly. If your priority is producing frequent visual variations from existing photos, the app may save effort. If your priority is maintaining an exact visual system across a campaign, a tool with deeper manual controls may be safer. The right choice depends less on whether one app is “better” and more on whether your work begins with inspiration or with a fixed production plan.
Small workflow choices that improve the results
One non-obvious advantage of starting with a small image set is that it helps you identify your personal “good source” pattern. After a few trials, you may notice that centered portraits respond better than crowded group shots, or that images with visible depth create more convincing movement than flat snapshots. I would keep those observations in mind when choosing future photos instead of expecting every image to behave equally well.
A second useful habit is to make a quiet version before a spectacular version. Begin with the least aggressive effect that still changes the image, then compare it with something more noticeable. This gives you a reference point and helps prevent the common problem of mistaking intensity for quality. For greetings, portfolios, and product previews, the restrained version may be the one people can watch repeatedly without fatigue.
A third trade-off involves editing after the AI transformation. Extra edits can improve focus, but they can also make the result feel overworked. I would first inspect the subject’s edges, facial features, and important text. If those areas look convincing, make only the adjustments that support the intended use. If they look distracting, changing the template or source photo may be more effective than adding another layer of effects.
For people who create content on a phone, I would also preview the finished piece at the size where it will actually be viewed. A detail that looks impressive when you zoom in may disappear on a small screen, while a strange edge that seemed minor may become obvious in a feed. This is a simple but valuable check because the app encourages visual experimentation, and experimentation can make creators focus on the editing process rather than the audience’s viewing experience.
Who should try it, and who should skip it
I would recommend Artlume to first-time creators who want to turn personal photos into short visual pieces without committing to a demanding editing course. It also suits social media users who need a quick way to vary static posts, artists who want to test visual moods, and small businesses looking for rough promotional concepts. The free entry point makes it reasonable to explore before deciding whether the paid items fit your needs.
It may also appeal to people who enjoy creative surprises. If you like seeing how one image can be interpreted in several styles, the AI approach can feel playful and productive. The app is particularly useful when you have an idea but not yet a finished plan. A quick generated concept can show whether a photo should become a moving greeting, a mood piece, or a short promotional visual.
I would skip it, at least initially, if you need exact control over animation, consistent results across many assets, or a detailed editing timeline. Professional designers working with strict brand rules may prefer a conventional editor where every change is deliberate and repeatable. I would also be cautious about using an automated result for an important public-facing project without reviewing it closely; creative speed should not replace quality control.
The Mature 17+ label is another reason to think about the intended user before installing it on a shared family device. Adults can evaluate whether its creative tools match their needs, while parents should pay attention to the age guidance rather than treating it like a general children’s drawing app.
What to do after the first successful video
Once you have one result you genuinely like, do not immediately chase the most elaborate template. Instead, repeat the same workflow with a second image that has a different composition. This tests whether you have learned a dependable process or simply found a lucky match between one photo and one effect.
Next, create a small personal routine: choose the source image, decide the intended audience, preview a restrained treatment, compare one alternative, and inspect the final details before sharing. That routine keeps the creative part enjoyable while reducing random trial and error. It also makes the app more useful over time because you begin selecting photos for animation rather than treating motion as an afterthought.
If you reach the point where Artlume gives you a strong concept but not enough finishing control, that is a natural place to combine it with another editor. Use this app for the photo-to-video idea, then use a timeline-based tool for exact captions, sequencing, or audio. That two-step workflow respects the app’s strength instead of forcing it to behave like software built for a different job.
My overall view is positive but measured. Artlume: AI Video Gen makes the first step from still photography to animated visual content feel approachable, and its combination of effects, templates, and edits gives beginners a practical place to experiment. It is not the answer to every video project, and the automated nature of the results means that source-image choice and personal judgment still matter. For someone who wants a quick, creative result from a photo, I think it is worth trying. If you value fast visual exploration more than frame-by-frame control, this is where the app makes the most sense.
Pros
- Turns text prompts into creative short videos quickly.
- Offers AI-powered visual styles for experimenting with ideas.
- Useful for social media clips
- concepts
- and mood boards.
- Simple interface makes video generation accessible to beginners.
- Cloud-based processing avoids demanding phone hardware requirements.
Cons
- Generation quality can vary significantly between different prompts.
- Complex scenes may show inconsistent details or motion artifacts.
- High-quality exports may require a paid plan or credits.
- Video creation can consume credits faster than expected.
- A stable internet connection is needed for most AI features.

- Category
- Art & Design
- Version
- 1.0.0