AR Art Projector: Da Vinci Eye
- 134.00
- 4.1
- Installs
- 50.00K
- Price
- $19.99

Screenshots
Analysis by Reviewed
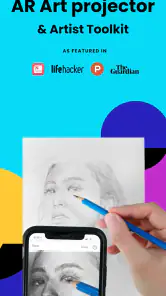
Before committing to a drawing session, I’d ask a simple question: will the phone stay useful without interrupting the act of drawing? AR Art Projector: Da Vinci Eye turns a phone into a visual guide for placing an image on a real surface. That makes it appealing when I want help with proportions but still want to make the marks with a pencil or brush. Its success depends less on flashy effects than on choosing a suitable reference, finding a steady setup, and being comfortable with a screen near the work.
Where the connection fits into the creative process
The drawing workflow is centered on an image, whether you choose one from the app’s library or upload your own. That makes the choice of reference an important first step: a clear, well-cropped subject is easier to interpret on a physical surface than a busy image with many competing details. I’d prepare the image before settling in to draw, so the time spent with the phone positioned over the work goes toward sketching rather than deciding what to trace.
Network access can matter when you are getting the app, exploring available artwork, or handling an image that has not already been made available on your device. I would not plan a lesson or a drawing session around an untested connection. Check that the reference you intend to use is ready before you start, especially if you’ll be working somewhere with patchy reception. The important practical question is not just whether the app can display an image, but whether your chosen image is available when you need it.
How it behaves in a real workspace
AR drawing is a hands-on setup, not a completely freehand digital canvas. You need to position your phone so its view lines up with the surface, then keep that arrangement usable while you draw. A table, a steady support for the phone, and enough light to see both the projection and your marks can make a session less fiddly. For a small sketch at home, that setup is manageable; for a large canvas or a crowded workspace, keeping the phone in a useful position may take more patience.
A realistic use is sketching a pet portrait on a quiet evening. I’d choose a reference with a readable outline, set the phone above the paper, and use the grid to check where the eyes, ears, and muzzle sit before committing to detail. If the image seems too hard to follow, I’d simplify the subject or work in stages rather than trying to copy every tiny feature. That approach makes the app more useful as a proportion aid and keeps the finished drawing from becoming a collection of traced fragments.
When a session needs a reset
Phone movement is one of the main practical risks: if the viewing angle shifts, the overlay may no longer line up with your marks. I’d pause and realign it before continuing instead of trying to compensate by drawing from a displaced image. Likewise, if the projection is difficult to see, changing the room lighting or choosing a simpler reference is more sensible than forcing a long session under poor conditions. These small adjustments matter because AR guidance depends on the relationship between the screen and the physical surface.
The time-lapse can make progress easier to review, but I would think about the recording before beginning if the workspace is personal or the drawing includes details I would not want captured. For a classroom exercise, it can be useful to revisit the order in which shapes were built; for a casual sketch, recording may add little. I’d use it when the playback will help me learn, not just because the option is there.
More From Our News Desk
Clash of Clans Is Won Between the Battles
Android Auto Makes the Case for Quieter Car Software

MobiOffice: Transforming Mobile Productivity with Seamless Integration

EA SPORTS FC™ Mobile Soccer: Redefining Mobile Sports Gaming
How Microsoft OneDrive Became a Mobile Productivity Giant
How Google Translate Breaks Language Barriers Effortlessly
Who benefits, and who may prefer another tool
This is most appealing if you already enjoy drawing but get stuck transferring proportions from a reference. It can also give a beginner a less intimidating way to start, since the image offers a concrete path into the first outlines. Compared with a standard drawing app, Da Vinci Eye connects the image to paper or canvas instead of keeping the work on a screen. Compared with a physical projector, it uses a phone-based AR approach, which is easier to bring to a small workspace but still asks you to manage the phone’s position while you work.
If your main goal is to build freehand observation, copying from a printed reference may be a better exercise because it does not place an overlay directly on the drawing surface. And if you want to paint or sketch entirely on a tablet, a conventional digital art app is the more natural choice. Da Vinci Eye is for the in-between workflow: using a digital reference to support a traditional, physical drawing.
Getting Started with Da Vinci Eye
The first thing you'll notice about the AR Art Projector: Da Vinci Eye app is its user-friendly interface. It's designed to make the process of projecting art as seamless as possible, even if you're not tech-savvy. Once you download and open the app, you're greeted with a simple tutorial that walks you through the basics. Trust me, it won't take long before you're ready to start projecting art like a pro.
Features That Stand Out
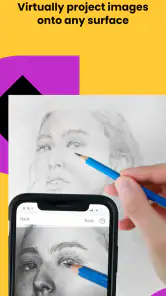
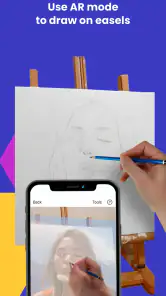
What makes this app shine are its unique features. The app uses augmented reality to overlay images onto a canvas or any flat surface. You can choose from a library of famous artworks or upload your own designs. This flexibility allows you to either replicate classic pieces or create something entirely new. I especially love the adjustable transparency feature, which lets you see the original surface through the projection. It's like having a digital art teacher guiding you through each stroke.
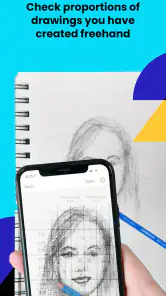
Another highlight is the grid overlay. It helps maintain proportions and ensures that your artwork doesn't go off track. This tool is a lifesaver for those of us who struggle with maintaining symmetry in our drawings. And, let's not forget the time-lapse feature. You can record your progress and watch a speedy playback of your entire creation process. It's not just satisfying to watch, but it also gives you an opportunity to review and improve your techniques.
Cost, fit, and the learning curve
The app has a 4.1 average from over 800 ratings, with more than 130 written reviews and over 50,000 installs. It costs $19.99, carries an Everyone age rating, and its current version is 3.2.5; it was released on April 10, 2018, and requires iOS 8.0 or later. I’d treat the price as a decision about how often you’ll use this particular phone-to-paper workflow, not as a promise that the app will make drawing effortless. If you expect to use it for several projects, lessons, or repeated practice, the dedicated tracing setup may be worthwhile. If you only want to copy one image, a printed reference and a pencil grid may be enough.
One useful trade-off is that the overlay can help you begin accurately, but it cannot decide which lines deserve emphasis or how to shade a form. I’d use it to place the large shapes, then look away from the screen and judge the drawing with my own eyes. That shift is especially helpful when tracing a photograph: matching every contour can produce a technically close outline that still feels flat. Let the grid support placement, then make choices about line weight and detail yourself.
Choosing a setup that suits you
For a beginner, the app is a practical bridge from looking at an image to making marks on paper; for a teacher, it can provide a shared starting point for discussing proportion and composition. It is less suitable if you want an app that teaches drawing through a structured course, or if you prefer an entirely digital workflow with layers, brushes, and editing tools. Those are different jobs, and a drawing tutorial or tablet art program will serve them better.
Before a class or a planned project, I’d test the exact reference and surface together rather than discovering a visibility problem halfway through. Try the grid on a simple subject, adjust transparency until the image is visible without overwhelming your pencil lines, and check that the phone stays aligned when you reach across the page. This short setup check can save more frustration than attempting to correct a drawing after the projection has shifted.
Making a phone-based workflow feel practical
There is a useful middle ground between tracing every line and ignoring the overlay. I’d first use it to place the main landmarks—such as the outside shape, the center line, and the spacing between large features—then reduce how often I look at the reference while filling in smaller forms. This turns the phone into a starting scaffold rather than a ruler for every stroke. It also gives me room to simplify a photograph into the shapes I actually want to draw.
For a quick everyday project, imagine making a greeting card at the kitchen table after dinner. I’d pick a simple flower or a small still-life image, set the phone where my hand is unlikely to bump it, and trace only the broad structure. If the family is moving around or the table is needed for something else, I’d stop at the outline and return later rather than trying to keep the device perfectly placed in a busy space. This is where the app feels most useful: a short, focused session with a modest drawing, not an elaborate setup that takes longer than the art.
Why You Should Try It
Even if you're not a professional artist, the AR Art Projector: Da Vinci Eye app opens up a world of creative possibilities. It's perfect for hobbyists, students, or anyone looking to explore their artistic side. The app makes art accessible and fun, breaking down the barriers that often intimidate budding artists. Plus, who wouldn't want to say they can draw with the help of da Vinci himself?
For art teachers and students, this app is a revolutionary tool. It can be used for lessons in technique, perspective, and composition. The interactive nature of the app makes learning engaging and interactive, which is a huge plus in any educational setting.
When another method is more dependable
The phone approach is not automatically the best way to transfer every reference. A printed image can be simpler when I want to compare the whole composition at a glance, make notes directly beside it, or work without balancing a device near wet paint. A hand-drawn grid on paper takes longer to prepare, but it encourages me to compare each section deliberately and can be a better choice when the goal is practicing observation rather than getting a quick outline.
On the other hand, if I want to create several variations from one image, use digital layers, or undo marks freely, I’d choose a tablet drawing app instead. Those tools keep the reference and artwork in one digital workspace, but they do not give me the same direct route to a physical sheet or canvas. The practical question is what I want at the end: a traditional drawing supported by a phone, or a digital illustration that stays on the screen.
Connectivity verdict
For a data-conscious routine, I’d prepare the reference in advance and avoid relying on an active connection at the moment I need to draw. Keep the image choice focused, since a clean subject is easier to position and interpret than an elaborate scene, and decide whether a time-lapse is genuinely useful before recording. These habits reduce avoidable interruptions without assuming anything about offline behavior or how the app handles data.
If an image or part of the workflow does not appear as expected, I’d first check the basics: whether the reference is ready, whether the phone is still aimed at the drawing surface, and whether the image remains easy to see in the current light. I’d then reset the setup and test with a straightforward reference before investing time in a detailed piece. That sequence separates an image-preparation issue from an alignment problem and avoids trying to rescue a sketch while the guide is visibly out of place.
Overall, I see Da Vinci Eye as a focused tool for getting an image onto a physical surface with more confidence, not as a replacement for practice or a full-featured art studio. Its strongest case is a hobbyist, student, or instructor who will return to the AR workflow and values help with placement. If that describes you, the cost may make sense; if you want freehand training, digital painting, or a one-off tracing aid, simpler alternatives are likely a better fit. I’d choose it for the right project, set up carefully, and let the technology assist rather than dictate the drawing.
Final Thoughts
In the end, the AR Art Projector: Da Vinci Eye app is more than just a fun gadget to play with; it's a bridge between traditional art and modern technology. Whether you're looking to improve your skills or simply have fun with art, this app is worth a try. So go ahead, download it, and step into the world of augmented reality art. Who knows, you might just discover your inner da Vinci!
AR Art Projector: Da Vinci Eye Frequently Asked Questions
What does AR mean in AR Art Projector: Da Vinci Eye, and what should I expect it to do?
AR stands for augmented reality: the app uses your device’s camera to overlay a selected reference image on a real drawing surface. It is an Art & Design app intended to help with photo drawing, tracing, and sketching. Think of it as a visual aid for transferring an image, rather than an app that creates a finished drawing for you automatically.
What is AR Art Projector: Da Vinci Eye used for?
AR Art Projector: Da Vinci Eye is an innovative app designed to assist artists by projecting reference images onto their drawing surfaces. This augmented reality tool helps users trace or sketch images with precision, making it ideal for artists looking to improve their drawing skills or create complex artworks with ease. By overlaying images onto physical surfaces through your device's camera, the app aids in accurate replication of images.
How do I use the AR Art Projector feature in Da Vinci Eye?
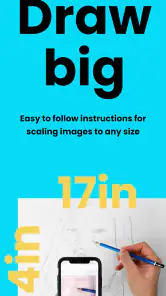
To use the AR Art Projector feature, start by selecting an image you wish to project. Position your device over your drawing surface, and the app will overlay the image via your camera. Adjust the size and position of the image as needed, then begin tracing or sketching. The app's intuitive interface ensures that even beginners can easily use the AR technology to enhance their art projects.
Is AR Art Projector: Da Vinci Eye suitable for beginners?
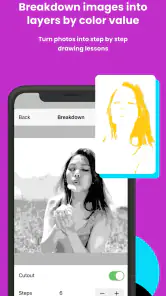
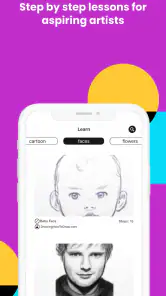
Yes, AR Art Projector: Da Vinci Eye is suitable for both beginners and experienced artists. The app's user-friendly interface and step-by-step guides make it accessible for those new to drawing or using augmented reality. Beginners will find the tracing feature particularly helpful, as it allows them to focus on developing their drawing skills without worrying about proportions and accuracy.
Does AR Art Projector: Da Vinci Eye require an internet connection?
No, AR Art Projector: Da Vinci Eye does not require an internet connection for its core functions, which means you can use the app anytime and anywhere without worrying about connectivity issues. However, an internet connection might be necessary for downloading updates or accessing additional features that may be available online.
Pros
- Innovative AR drawing tool.
- Enhances artistic skills.
- User-friendly interface.
- Supports various devices.
- Real-time drawing guidance.
Cons
- Premium features require payment.
- May drain battery quickly.
- AR requires good lighting.
- Limited free features.
- Occasional app crashes.

- Category
- Art & Design
- Version
- 3.2.5