AR Sketch : Sketch & Trace
- 7.00
- 3.9
- Installs
- 500.00K
- Price
- Free
Screenshots
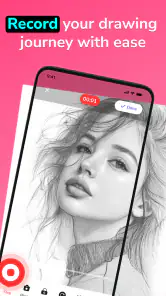
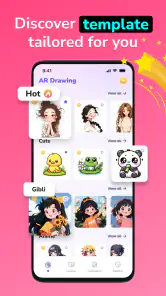
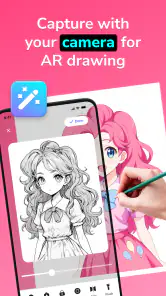
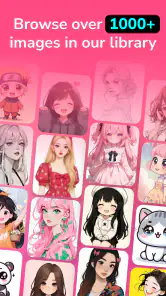
Analysis by Reviewed
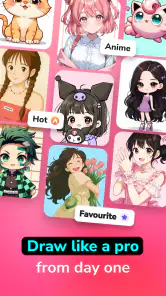
I spent time with AR Sketch: Sketch & Trace to see whether its central idea—using augmented reality to help turn photos into anime and cartoon-style sketches—actually makes drawing easier, or merely makes a striking first impression. My conclusion is fairly simple: this is a useful visual guide for beginners and casual creators, especially when a blank page feels intimidating, but it is not a replacement for learning proportions, line control, or a full drawing workflow.
The app sits in the art and design category and is made by NowTech - Halo Group. It is free to install, with optional in-app purchases priced from $6.99 to $11.99 per item. Its audience rating is Everyone, and it runs on Android 7.0 or later. That combination makes it approachable for a family tablet, an older phone, or someone who wants to experiment without committing money immediately.
What interested me most was not the anime styling by itself. Plenty of apps can apply a cartoon filter to a picture. The more practical promise here is the ability to use a transformed image as a drawing reference through the camera view. That changes the experience from “press a button and receive an effect” into “use the screen as a visual guide while I make the marks myself.” For a new artist, that difference matters.
Tracing a reference instead of guessing at the page
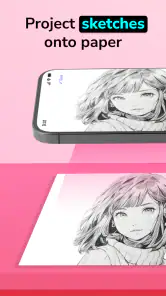
The main capability is best understood as a bridge between a photograph and a hand-drawn sketch. I can start with an image, let the app reinterpret it as an anime or cartoon-like reference, and then use the AR view to position that reference while working on paper. The phone becomes a kind of transparent guide: I still have to draw, but I no longer have to invent every proportion from memory.
This is especially helpful with faces. A portrait can be difficult because small errors in the placement of the eyes, jaw, or hairline quickly change the likeness. A stylized reference reduces some of that uncertainty. Instead of copying a complicated photograph with every texture and shadow, I can work from clearer shapes and stronger contours. The result is not automatically good, but the first step is much less intimidating.
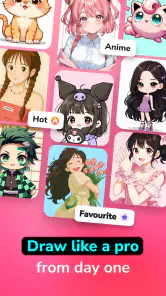
The anime and cartoon treatment also affects what I choose to copy. A realistic photograph contains many details that are difficult to translate into pencil lines. A simplified version gives me a more manageable target. I can concentrate on the outline of the head, the direction of the hair, the position of the shoulders, and the major dark areas before worrying about decoration.
The real strength is not automatic drawing; it is reducing the guesswork between looking and making. That distinction is important. If someone expects an instant finished illustration, this will feel limited. If someone wants help beginning a drawing, the AR approach has a clear purpose.
More From Our News Desk

Clash of Clans Is Won Between the Battles

Android Auto Makes the Case for Quieter Car Software

MobiOffice: Transforming Mobile Productivity with Seamless Integration

EA SPORTS FC™ Mobile Soccer: Redefining Mobile Sports Gaming

How Microsoft OneDrive Became a Mobile Productivity Giant
How Google Translate Breaks Language Barriers Effortlessly
What the AR view changes while drawing
In a conventional reference workflow, I would place a photo beside my paper and repeatedly look back and forth. That works, but it introduces friction. My eye has to compare two separate surfaces, and my hand has to estimate where each feature belongs. With an AR guide, the reference can be aligned with the page, so the relationship between the on-screen image and the physical drawing surface becomes more direct.
That does not mean the phone understands whether my sketch is accurate. I remain responsible for holding the device in a useful position and following the guide. The app helps with placement, not judgment. I still need to decide how lightly to begin, which lines deserve emphasis, and when to stop tracing and start interpreting.
I found that the best results come from treating the overlay as scaffolding rather than a cage. I can use it to establish the broad structure, then lower my dependence on it as the sketch develops. Following every visible line too literally can produce a stiff result, particularly when the source image has complex hair, clothing, or background elements.
There is also a useful creative compromise: I can trace only the main silhouette and facial landmarks, then design the remaining details myself. This keeps the proportions grounded while leaving room for personal choices. For children or absolute beginners, that approach is less frustrating than asking them to reproduce an entire image line by line.
Turning a photo into a workable drawing reference
The photo-to-sketch transformation is most useful when the source picture already has a clear subject. A face with a strong outline, a person standing against a relatively simple background, or an object with recognizable edges gives the app something easier to translate into a drawing guide. A busy group photo is a more demanding starting point because there are too many competing shapes to organize.
I would prepare the image before trying to draw from it. Cropping away unnecessary surroundings can make the subject easier to read. A simple pose is also better for a first attempt than a dramatic angle. These are not glamorous tricks, but they have a larger effect on the final sketch than repeatedly changing artistic settings.
For an anime-inspired result, I would begin with a portrait where the eyes and hair are visible rather than hidden by strong shadows. For a cartoon interpretation, a distinctive silhouette may matter more than facial detail. The best source depends on what I want to practice: facial construction, gesture, clothing shapes, or a recognizable outline.
One non-obvious benefit is that the app can help me compare styles without requiring me to redraw the subject from scratch each time. I can explore how a familiar face behaves when simplified into different visual language, then decide which version is easiest to reproduce manually. That makes it useful as a style-experiment tool, not only a tracing aid.
How I would use it in a normal drawing session
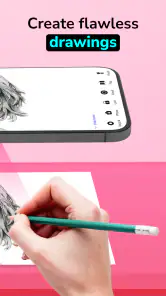
I would begin with a stable surface and a sheet of paper that is not too small. The phone needs to remain positioned consistently while I work, so a cramped desk or a handheld setup can quickly become annoying. I would choose the reference before picking up the pencil, make sure the subject is framed clearly, and start with very light construction lines.
The first pass should focus on large relationships: the outer shape of the head, the angle of the shoulders, the center line of the face, and the general direction of the pose. I would resist the temptation to draw eyelashes, hair strands, or clothing patterns immediately. Those details are satisfying, but they can distract from a misplaced structure that becomes harder to correct later.
After the basic shape is in place, I would use the AR reference to check the spacing between features. This is where the app is more valuable than a simple cartoon filter. The converted image gives me an organized target, while the overlay helps me see whether my pencil marks are drifting. I can then redraw the key lines with more confidence rather than darkening every early mistake.
For a beginner, I recommend dividing the process into three passes:
- Use the first pass for broad shapes and proportions.
- Use the second pass for important contours, facial features, and major clothing forms.
- Use the final pass for selective details, cleanup, and personal changes that are not present in the reference.
This workflow prevents the app from becoming a substitute for observation. It also gives the finished drawing a better chance of looking intentional. A pure trace can be accurate but lifeless; a guided sketch that includes a few personal decisions feels more like an illustration.
One practical tip is to keep the phone slightly farther away than feels necessary at first. A close view may make individual lines look tempting to copy, but it can hide the overall composition. I prefer to establish the whole subject, then move my attention toward smaller areas. If the reference is constantly zoomed into one eye or one section of hair, the final proportions can suffer.
Another useful habit is to pause the creative process occasionally and inspect the paper without the overlay. If the sketch only looks correct while the guide is visible, I have probably followed details without understanding the underlying forms. Short checks without the AR view reveal whether the drawing is becoming a coherent image or merely a collection of copied marks.
A realistic everyday scenario
Imagine a student wants to make a birthday card featuring a friend as an anime character. They have a phone photo, a pencil, and no formal drawing training. With a normal photo beside the paper, they may spend most of the session guessing where the eyes should go and then abandon the attempt when the likeness feels wrong. This app gives them a simplified reference and a way to align it with the card.
I would crop the friend’s face and upper body, choose the clearest stylized version, and use the guide only for the head shape, eyes, hair mass, and shoulder angle. Then I would remove or invent the background, add a speech bubble, and exaggerate one recognizable feature such as glasses or a favorite hairstyle. The app handles the difficult starting structure, while the personal additions make the card feel handmade rather than mechanically copied.
That scenario shows where the app earns its place. It does not need to produce professional concept art to be worthwhile. Helping someone finish a personal card, decorate a notebook, or create a first character sketch is a meaningful use case, particularly when the alternative is never starting.
The trade-offs behind the easy first step
The biggest limitation is that tracing can create confidence without creating skill. I may produce a pleasing image while the guide is active, yet still struggle to draw the same character from another angle. That is not a flaw unique to this app, but it is a risk built into the concept. Anyone hoping to improve should gradually use the guide for construction and then practice drawing without it.
The AR method also depends on a comfortable physical setup. Holding a phone over paper for a long session can be tiring, and movement between the device and the page can affect alignment. A casual five-minute sketch is a natural fit. A detailed illustration may require more patience, especially if I need to keep the camera view steady while refining small areas.
There is a second trade-off between stylization and likeness. The anime or cartoon interpretation can make a photo easier to copy, but it may also change the person’s features. That is helpful when the goal is a character design, less helpful when I want a faithful portrait. In that situation, a conventional photo reference or a dedicated portrait-drawing tool would give me more control over subtle expressions and realistic proportions.
The free entry point is welcome, but the optional purchases affect how I judge the app for regular use. A person who only wants occasional creative prompts can try it without paying. Someone building a serious illustration routine should consider whether the available tools justify spending from $6.99 to $11.99 on individual items. I would not buy anything until I had tested the basic workflow with several different photos.
The app’s average rating is 3.9 from around 926 ratings, which feels consistent with a product that offers an appealing idea but may not suit every drawing style or device setup. It has passed 500K+ installs, so it is not an obscure experiment, yet popularity should not be confused with professional depth. I see it as a focused creative utility rather than a complete digital art studio.
Compared with a standard filter app, this is more hands-on because the output is intended to guide a physical drawing. Compared with a full illustration app, it is narrower and easier to understand, but it lacks the broader editing environment I would expect for layers, advanced brushes, and detailed finishing. Compared with simply placing a photo beside the paper, it reduces some visual guesswork while adding the inconvenience of managing a phone during the session.
That comparison helps clarify who should skip it. I would not choose this as my main tool if I already draw confidently from observation, need professional digital painting controls, or want precise control over every line in a realistic portrait. I would also skip it for long technical studies where the goal is anatomy, perspective, or independent construction. A structured drawing course or a capable art application would be more suitable there.
Small workflow choices that make a difference
My first recommendation is to use the app for landmarks, not every mark. Align the center of the face, the eye line, the jaw, and the outer silhouette, then draw the rest with the guide less dominant. This produces a more natural result and turns the app into a teaching aid rather than a tracing machine.
My second recommendation is to keep a few versions of the same subject. A close portrait can help with facial placement, while a wider image can help with posture and clothing. Trying to force one crop to teach both things often makes the reference too busy. Separating those goals makes each drawing session clearer.
My third recommendation is to use the transformed image as a design prompt even when I do not trace it. I can study how the app simplifies the nose, groups the hair, or exaggerates the eyes, then create a new pose on my own. This is a better long-term use than repeatedly copying the same source photo because it transfers some of the visual decisions into my own practice.
I would also save time by deciding the purpose of the drawing before opening the camera view. If I am making a quick sticker-like sketch, I can accept bold simplification. If I am preparing a thoughtful portrait, I need to preserve more of the subject’s expression and may prefer a less stylized reference. The tool becomes more effective when I choose the level of accuracy first.
Who gets the most from this focused tool
Beginners are the clearest audience. If drawing from a blank page feels impossible, the app offers a visible starting structure without requiring a complicated lesson. Children can use it for playful character sketches, while adults can use it for cards, journals, gifts, or small creative projects. The Everyone content rating also makes it easier to consider in a shared household setting.
Casual creators who enjoy anime and cartoon aesthetics will probably get more value than users seeking realism. The transformation is most convincing as a way to simplify and reinterpret a subject, not as a promise of exact photographic reproduction. People who already have a favorite photo collection may also enjoy turning familiar images into drawing prompts.
Teachers, parents, or workshop leaders could use it as a low-pressure introduction to proportion and visual observation. The important lesson would be to move from tracing toward independent drawing. For example, one exercise could involve following the guide for the first pass, hiding it for a second attempt, and comparing which shapes were remembered. That turns a simple app session into a small practice routine.
The current version is 1.1.4, and the app supports Android devices running version 7.0 or newer. Those details make it accessible across a broad range of Android hardware, although the practical comfort of the AR experience will still depend on the individual phone and how easily it can be positioned over the page. I would test it on the intended device before planning a long drawing project.
For iOS users, I would judge the experience by the same central question: do I want a guided physical sketch, or do I need a complete digital canvas? The former is where this concept makes sense. If I want brushes, layers, corrections, and polished digital output in one place, a traditional illustration app is the better category.
After using it, I see AR Sketch: Sketch & Trace as a friendly on-ramp rather than a destination for advanced artists. Its best contribution is removing the fear of the first line. The anime and cartoon conversion gives me a clearer reference, and the AR alignment makes that reference more actionable than a passive filter.
I would recommend trying the free version if you want to draw from your own photos, especially for gifts, character experiments, or a first step into portrait sketching. I would keep expectations realistic, use the overlay selectively, and avoid paying for extras until the basic process feels comfortable. For me, the app succeeds when it helps a hesitant person begin drawing—and becomes even more valuable when that person eventually learns to draw without it.
AR Sketch : Sketch & Trace Frequently Asked Questions
Is AR Sketch: Sketch & Trace free to download, and are there optional purchases?
AR Sketch: Sketch & Trace is free to download, so you can try its drawing-aid approach without paying upfront. It also offers in-app purchases, with items priced from about seven to twelve dollars. Check the purchase options in the app before buying, and consider whether any paid features suit the way you plan to use it.
Will AR Sketch: Sketch & Trace work on my phone?
The app is available for Android devices running version 7.0 or later. Before downloading, check your phone’s operating system version and make sure the device can use its camera, since viewing a reference over your drawing surface is central to the experience. The app is intended for everyone and focuses on art and design.
What is AR Sketch: Sketch & Trace, and how does it work?
AR Sketch: Sketch & Trace is a drawing aid that uses your phone’s camera and augmented reality to place a digital reference image over the real world. After choosing or importing an image, you can view it on your drawing surface through the screen and trace the visible lines onto paper. It is designed to help beginners practice proportions, outlines, and basic illustration techniques.
Do I need a tripod or any additional equipment to use AR Sketch: Sketch & Trace?
You can try the app by holding your phone above the paper, but a tripod, phone stand, or adjustable overhead mount makes the experience considerably easier. A stable setup prevents the reference from moving while you draw and keeps the camera at a consistent angle. Good lighting and a flat, uncluttered surface are also important for comfortable and accurate tracing.
Can I use my own images, or am I limited to the app’s built-in references?
The app is generally intended to support both ready-made drawing references and personal images, depending on the features available in your installed version. You may be able to select a picture from your device, adjust its size or transparency, and position it over the paper. Results can vary with image quality, so high-contrast pictures with clear outlines are usually easiest to trace.
Pros
- Beginner-friendly tracing tools make drawing practice approachable.
- AR overlays help users understand proportions and basic perspective.
- Useful for copying references onto paper without complex setup.
- Simple interface lets you start a sketch quickly.
- Suitable for practicing objects
- characters
- and simple illustrations.
Cons
- Requires a steady phone position for accurate AR alignment.
- Lighting and camera quality can affect overlay visibility.
- Some useful tools or content may require in-app purchases.
- Small screens can make detailed tracing uncomfortable.
- Extended use may drain the battery because the camera stays active.
- Category
- Art & Design
- Version
- 1.1.4